
Source: TimeSplitters 2 Prima's Official Strategy Guide
NeoTokyo is the fifth Story level in TimeSplitters 2. In this level, Ghost must follow Krayola to gain entrance to the hacker's compound so he can clear himself of the crime the hackers framed him with.
Briefing[]
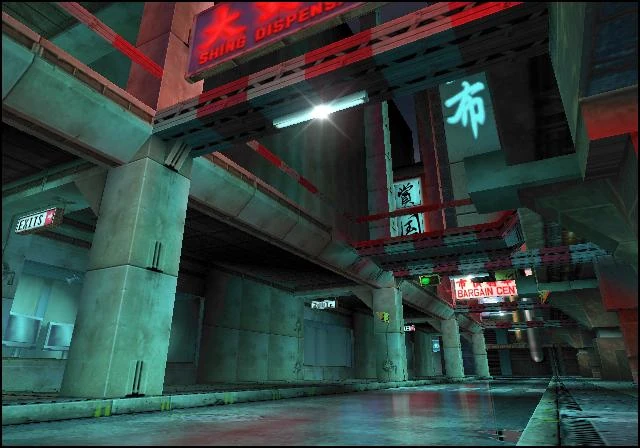
2019 NEOTOKYO - Tek Quarter
Sadako's hacker gang have stolen a prototype Cyber Rig from the government research labs. Rumour is that the rig incorporates some kind of alien biomatter and is powered by crystal lattice energy.
Faked computer records, which the hackers planted at the labs, framed Ghost for the break-in and now police are crawling over the Tek quarter looking for him.
The only way for Ghost to clear his name is to tail one of the hackers to their secret research area and gather evidence of their activities.
Primary Objectives[]
- Follow the Hacker to the research area (All)
- Deactivate the TimeSplitter machine (All)
- Eliminate the gang leader before she escapes (Easy)
- Kill the Hacker Chief (Normal/Hard)
- Retrieve the Time Crystal (All)
- Photograph the evidence (Normal/Hard)
- Upload it to the police server (Normal/Hard)
- Escape through the Time Portal (All)
Secondary Objectives[]
- None
Arsenal[]
Characters Encountered[]
Allies[]
- Chastity (P2)
- The Master (Singular) (Normal/Hard)
Enemies[]
- Sadako (Singular)
Unlocks[]
- Normal/Hard: Sadako
Intro[]
Ghost fights Sadako and her gang of hackers onboard a subway train. During the fight, Sadako's helmet is knocked off, revealing her deformed face. Ghost is eventually overpowered and knocked out.
Strategy[]
Used With Permission from SuperNova
Easy Strategy[]
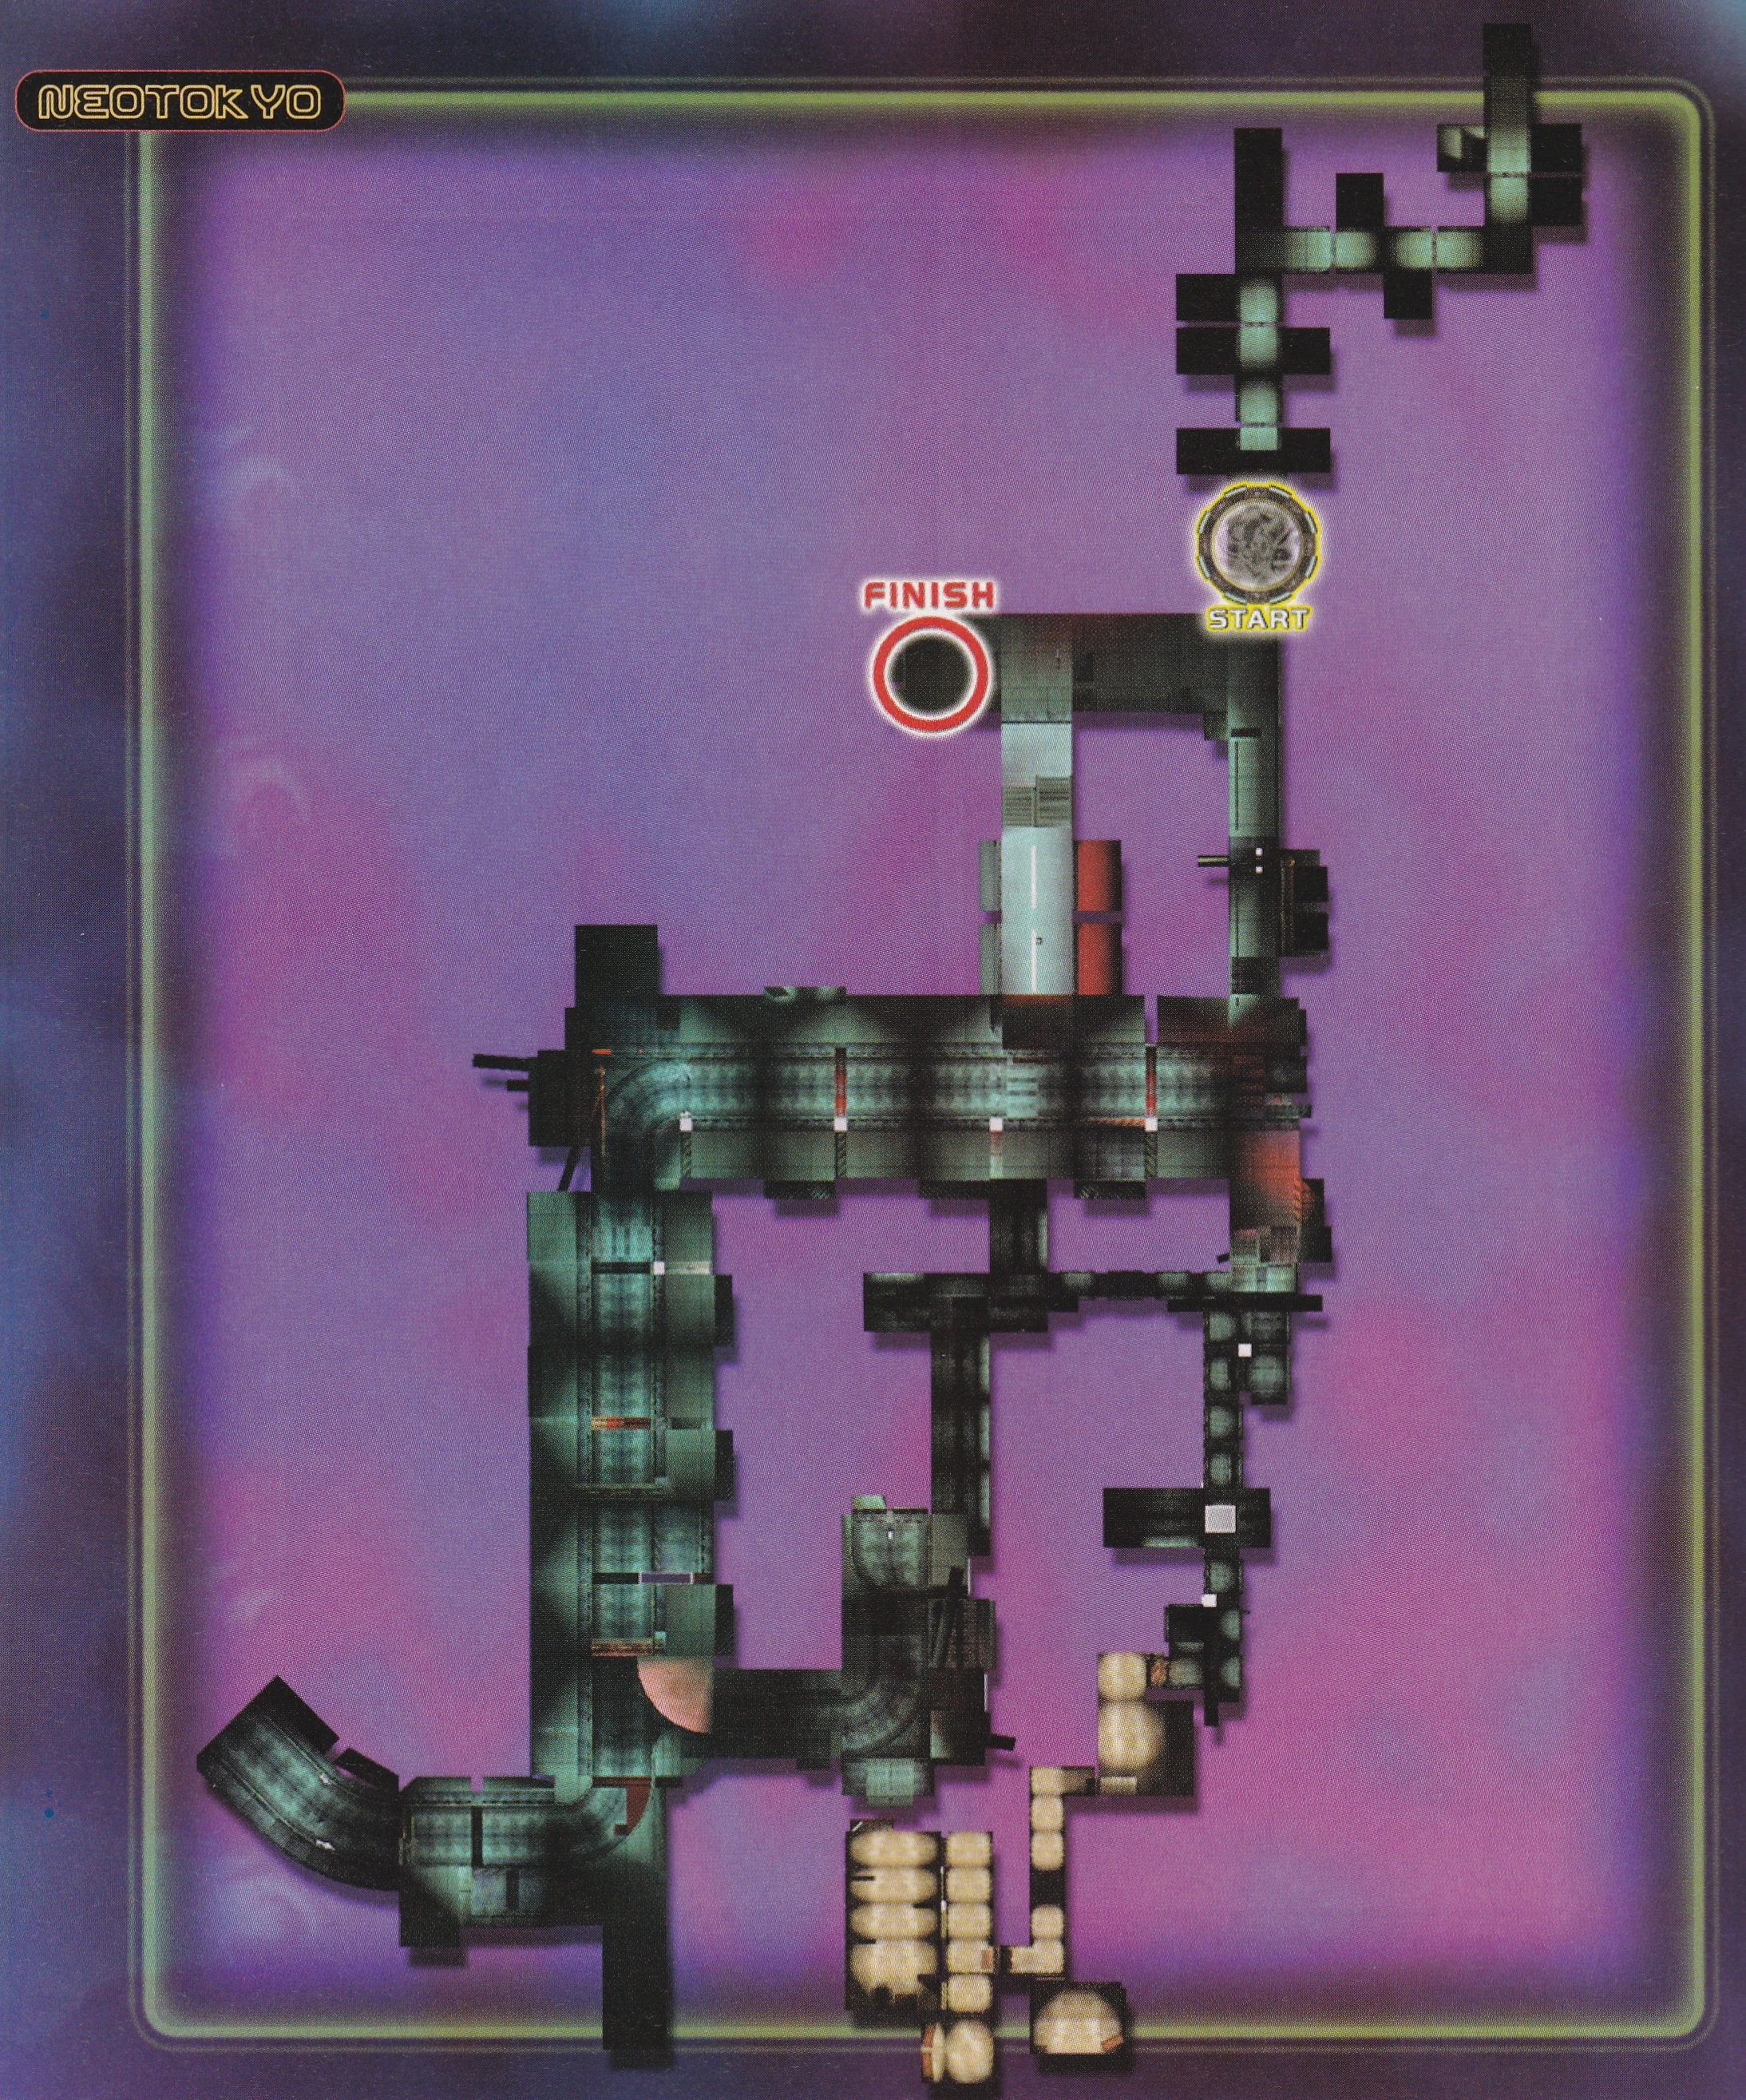
Wasn't that Matrix meets Bruce Lee style battle on the train really cool? Anyway, you've arrived at Maru station, so follow the hacker (Krayola). Keep a fair distance - say, six feet, but don't lose her. She'll turn the corner, then go left up the steps. She will then descend some flights of steps - be careful here. If you are at the top of the stairs when she descends the second flight she will see you and it will be mission failed. At the bottom are glass displays containing pistol and sniper rifle ammo. Smash the glass with your fists to avoid getting hurt, but make sure the hacker isn't too near when you do. She will then go into the street - be careful, there are cameras here. Use your uplink to make sure that they don't spot you. She crosses the road, so follow in her footsteps - that guarantees that the cameras won't see you. From the station she goes right down the main street, across the road, left into the next street and left again into a side alley.
Here she descends into the entrance to the hackers' base. On the way is some armor behind some glass - be sure to collect it. If you follow her carefully she shouldn't see you.
Follow her through this tunnel until she gets to a blue laser grid. Another hacker will let her in. When they are both a fair distance down the corridor rush into the little room on the left (if you wait too long you get locked out). Go to the panel and look through the third camera, having switched the other two off. Wait until you see her type on the laptop, and you'll finish the objective (get the codes to open the door). Turn off this camera too then go into the corridor. Sneak up on the hacker standing guard and punch her in the back. Go forwards to the room with the laptop and activate it. The door will open and you'll reach a checkpoint.
Go through the door you just opened and shoot a hacker in the back. Two more will quickly appear, so kill them too. Then go down the corridor and enter the room straight ahead. On the left when you enter are some lockers; activate the one on the left and you'll find the SBP90 machine gun. There is also some armour in the room. Now exit and turn left. You'll see some windows and a door on the right. Enter it. At the other end of this room is a machine with a TimeSplitter on it. To the right of the machine is a switch. Activate it and complete another objective. Then Sadako will appear behind you, so use your SBP90 to blast her. She'll cloak herself and run away, but you can follow her silhouette, blasting away with your machine gun. Soon she'll die and leave you the time crystal. Collect it and go out into the street (many hackers attack you, but your SBP90 should make short work of them). From the entrance to the base go through to the main street and left to the bridge, where the time portal awaits you.
Normal/Hard Strategy[]
The first part of this mission is made very complicated by the fact that the hacker is now cloaked. You can just about see her outline. She can still see you though, so be careful.
Let her walk on a little then turn the corner. Follow carefully then go left up the steps while she goes on to the winding staircase with "Maru Station" written above it. Go downstairs and you'll be at street level. On the right are two glass sheets. Punch them to break into the ammo stores behind. When you've visited both you should have a sniper rifle and a pistol, and are ready to face the hard part ahead.
Take out your uplink and dodge between the sight of the cameras. They won't see you if you're not in the pink area. Be sure not to go further ahead than the hacker. She stops halfway down the first street to look around. When you come near the corner put your uplink away and get out your sniper. Aim at the camera in front of you and pop a bullet in its lens. Use your uplink again to dodge the next two cameras on the left and right of the road (to avoid their sight go behind the pillars they're mounted on). However, you'll soon come to a massive police gunship which is a red splodge on your uplink. Get too near to this and it sees you (mission failed). Crouch behind a pillar facing the direction it comes from and wait until the danger has passed.
When you come to a T-Junction branching off to the left hide on the right sidewalk and use your sniper to take out the camera on the right wall of the side street. Move right a little and you'll spot another camera at the end of the street. Shoot that too. It's now safe to run down to the end, where the hacker should just be entering a ramp leading underground to the left of where you arrived. Follow her in.
This sewer place goes right then right again at the end of another corridor. There is a small room with blue laser here. The hacker will go inside, so wait about four seconds then run into the locked corridor and get inside the control room immediately on the left. Activate the machine and turn off the first two cameras. The third offers a view into a room with yellow walls. Focus the camera on the laptop and when the hacker's blurred profile has passed over it then left the room you will know the code. Turn this camera and take out your fists. Creep down the corridor and punch the guard in the back. She drops in one hit. Trample over her body and take a right into the yellow room. Go up to the laptop and activate it. The door in the wall will open after a few seconds. Go inside and you'll reach a checkpoint.
Back out onto the steps leading up to the door again and ready your sniper. Aim at head height in the corridor in front of you. A guard will soon walk into your crosshairs. Drop her. Get your pistol out and aim down the corridor in the direction she came from. Walk down to the door at the end and open it. Shoot some bullets into the gal there then back off to the checkpoint door. Cautiously turn the corner and shoot some bullets into one of the four guards shooting at you. Strafe back behind the wall and repeat until all four of them are dead.
Run down to their sprawled bodies and get their ammunition. You should have an SBP90. Yes! Enter the room where you shot the first girl and you'll notice an autogun and a computer. There are also cupboards in the wall. They contain the AstroLander cart and an SBP90 (more ammo). Also collect the Digital Camera on the table - you'll need it for your next objective.
Take out the Digital Camera then head through the doors you haven't opened yet. You'll appear in a corridor with windows opposite. Go to the far left window and you'll see a TimeSplitter stuck in a machine. Take a photograph (trigger button) then head into the room next door. There are plans thoughtfully left for you to use as evidence on the table to the right. Photograph them too then head back to the corridor. You'll notice two turrets on the walls, use your pistol to shoot one bullet in their lens. Head back for the cupboard room, and do the same for the third turret. Then activate the laptop to upload the evidence to the police server.
As soon as the evidence has been uploaded the alarm will go off and the autoguns in the base will be activated. Fortunately, without a lens they can't see you, so you can wander safely.
Enter the room with the TimeSplitter machine and run towards it. Dodge nimbly out of the way as the 'Splitter unloads 1,000,000 volts of electricity at you. Quickly flick the switch on the side of the machine to turn it off then leave the room. A guard is waiting for you outside. As soon as you shoot her another one appears from through the doors. Go on and a third comes to harass you. When she dies peep round the corridor leading to the yellow room. Another gal is doing the same thing from her end. Carefully aim to kill her then get her ammo at that end.
There's another enemy through the doorway. Gun her down. Look down the sewer corridor, hugging the left wall. You'll come to an alcove in the side with a guard standing there. Shoot, collect ammo, climb back up to corridor again. Another is waiting in the camera control room. Get her pistol ammo and switch to silenced pistol. Another girl runs in from round the corner. Try to headshot her. Look down the corridor she came from. Down the sides at the other end are three shooting guards. Carefully strafe round the corner and shoot them with your pistol then strafe back. Repeat until the road to the outside world is clear.
When you can safely head out do so. Behind the underground entrance is a guard. Shoot her and you'll hear exploding noises. Run back onto the main street, SPB90 at the ready. Guards run out from both sides of the screen, and you probably don't have much health left now. Kill them ASAP then run down the left path that leads to a dead end. There are some riot control policemen here. Kill them to clear the way to the Time Portal when you finish the mission.
Run back down the streets you followed the hacker through after Sadako. There are enemies everywhere, both police and hackers. You are very likely to get killed here if you don't stay on your guard. Fortunately, at the foot of Maru Station is the Master, who heals you fully. Hunt down the hacker chief and kick her ass proper, then get the Time Crystal. Leg it back to the portal to finish.
Lazy Normal Beginning Strategy[]
Start off in your spawn and jump off the ledge. Take out your uplink and dodge all the cameras and get into the sewer before she does. Go all the way until you go down a little tiny ledge (before the room with the blue lazer door) and hide under it. Now wait until she comes and passes you. (Sometimes she will see you for no reason, just restart until she walks by.) Then follow her in and do everything the above says.
Videos[]
 (17 KB)")
 (17 KB)")
 (16 KB)")
Trivia[]
- Similarly to Sibera, this level was originally intended to appear as a selectable Arcade map, but was removed for unknown reasons.
- The NeoTokyo level is heavily inspired by the influential 1982 science-fiction movie Blade Runner. Most obviously, the flying police cars that hunt for the player are virtually identical to the police 'spinners' featured prominently in the film. The level features talking "cross now" pedestrian crossing signals similar to those heard in the movie, and the NeoTokyo music lifts sections from the Blade Runner's end title theme. Furthermore, the mission takes place in 2019, the year the movie is set.
- NeoTokyo can only be in two modes: Story and Challenge.
- NeoTokyo also shares its name with the NeoTokyo city from Akira anime, which is also set in 2019.
- In Normal and Hard modes, The Master will heal you if you find him in a back alleyway.
- The AstroLander game cartridge is found in one of the lockers in the computer uplink room in Normal or Hard modes.
- The opening fight scene uses the music from Return to Planet X, the Story mission before NeoTokyo.
- The police officers of NeoTokyo carry sci-fi handguns, the same weapon used prominently in Return to Planet X (2280) and Robot Factory (2315). Since those two levels are set centuries after NeoTokyo, it would seem odd that the same handgun would be in common use for nearly 300 years. This could suggest that perhaps the presence of the sci-fi handgun in NeoTokyo may be a result of a TimeSplitter-altered timeline (although the reasons for arming the Tokyo police with a centuries advanced weapon is unknown), or this gun could have just been genuinely used for a very long time in combat.
- The final part of this mission is drastically different in Easy difficulty than it is in Normal or Hard. After shutting down the TimeSplitter machine, you must chase Sadako through the compound, who occasionally takes shots at you with her Silenced Pistol. She also possesses a cloaking device, something she lacks in the harder difficulties. On Normal and Hard, by comparison, she simply comes after you upon leaving the compound.
- When you first exit the sewer after uploading the evidence, some of the hackers behind the crates may throw grenades at you. This appears to be the only occasion in TimeSplitters 2 where grenades are thrown, and not launched out of a Grenade Launcher or a Soviet S47. However, they will only throw them while not being observed; it can be assumed that there are no animations for the action.
- The level resembles the Industrial Tile set, the music having the same melody. AstroLander also has the same melody.
- There is a glitch that allows you to ride on the cars in the level. However, trying to do so will take some practice, as it is hard to get right.
- Normally, when you fail the objective for Obtaining the Hackers Password, when you put in a code, it will be a random number from 0000 to 9999. It is possible to guess the correct combination as it is determined when you load into the level and does not change if you fail the objective. Even if you get the correct code and get into the door, you will get a failed screen when you go through the time portal.
Return to Planet X — NeoTokyo (Story) — Wild West |
